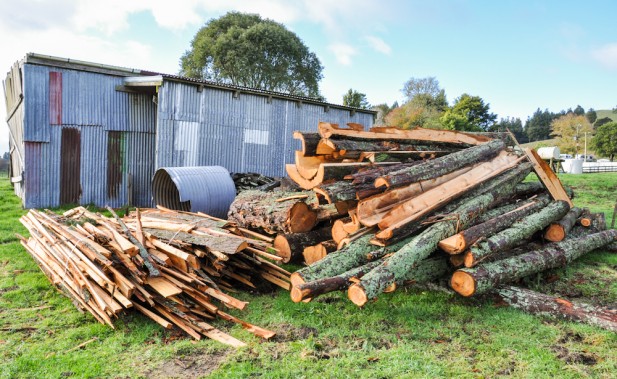
One thing this farm came with a lot of was wood. Wood, wood, wood. Don’t get me wrong – it’s a good thing. It’s one of the most valued resources on a farm. The problem is, where do we store it all? We can’t just leave it outside to rot in the elements.
We have a surplus of useful odds and ends which we’ve compiled in the barn, sourced from around the farm. I’m always in there fossicking through material for various farm fix-ups. Firewood was also plentiful when we moved here, readily seasoned and piled in a woodshed adjacent to the barn. This abundance grew to absurd proportions when we cut down some large trees for the sake of getting broadband. As you might have read, the offcuts of those trees after milling gave us a heck of a lot more wood to contend with:
Now that we’ve almost finished chopping/splitting this hoard of cypress, we need a place to keep it while it seasons for the next year or two. We couldn’t just biff it in the old woodshed with the other firewood, because that lot is already dry and ready to be used. We noticed that one of our unused sheds could be divided if we built a wall.
I spent a good while searching the barn for some suitable building materials, and found two long posts which would be perfect for the supports. These we had salvaged from the old water tower we’d dismantled earlier. I dug them into the ground and nailed them to the rafters above.
Then I found some cross beams and screwed them on. Getting these level by myself was a little tricky. It was made easier, though, with our new cordless driver – no more tripping up on power cords!
I put a third vertical support in because it seemed a little wobbly in the middle. Unfortunately I didn’t have another long round post, so I had to be inventive by using spacers on the middle support.
I called it a day at this point, since we needed to buy some more wood (ironically) for the vertical slats.
After we picked up some appropriate lengths of cheap wood from the nearest hardware store, Char joined me for the remainder of the build. The lengths we brought home were odd, so we first had to cut them all.
It didn’t take too long with Char measuring and me sawing. Never underestimate the utility of an extra pair of hands.
It’s a good thing Char was with me on this occasion; her suggestion of using a string line saved us much time and labour.
We really should get some proper clamps. We’ve needed some a few times already, and have resorted to using the one that came with our jig set. It worked fine for this task, but needed constant adjustment. The right tools for the job can save you from a lot of stress and wasted time.
Along with the clamp to hold the wood in place while we screwed it on to the cross beams, we used a wooden spacer so the distance between the planks would be uniform. This took a bit of dirty math, because when working with imperfect wood, it’s never exact. Sometimes you have to just eyeball it.
Halfway there!
We had a good rhythm going; I’d hold the plank while Char directed it flush with the string line, we’d fiddle with the spacer between the slats, then I’d bang a screw into the centre and a couple into the base, then pass the driver up to Char to bang in the top two screws. Swish.
Woodshed wall complete!
We chucked some old pallets on the ground to keep the firewood from absorbing moisture and rotting.
We’ve commandeered about what looks to be a third of this shed for firewood. We may use the space on the right of the woodshed as a make-do animal shelter at some stage.
Now we’ve just got to finish chopping and splitting this ridiculous pile of wood…
At least we have some place to store it all now. Let’s hope it fits.


Awesome
🙂
Shelter for the night!
Aaaahhhh… lovely!! Your projects are ALWAYS executed so beautifully – neat, finished, well proportioned and pretty suave to look at too… plus it’ll stand the test of time and work like it’s meant ta!! Good on ya’s xx